How to Containerize a Spring Boot App

I'm a software engineer interested in Cloud technologies and web applications.
I am going to show you how to set up a Spring Boot project to run in a Docker container. This will allow you to run your code on any platform where Docker is installed! Anyone will be able to collaborate and run the project by running one line of code. I am going to assume you already have Docker and optionally Apache Maven installed. Let's get started!
TLDR: Here is a link to my git repo for this post: Spring Boot Docker Intro
1. Checkout and (Optionally) Run Spring Boot App
Note: If you cannot run the app or don't have Maven installed it's not a big deal. We will get it running in the container! I just typically like to be able to run an app outside of a container before I containerize it. This helps me debug issues if the app does not run as expected in the container.
First, let's create a new Spring Boot project. Checkout the following Spring Boot starter app:
git clone https://github.com/spring-guides/gs-spring-boot
This is a tutorial project, but we can skip to the complete project for the purpose of getting this containerized!
cd gs-spring-boot/complete/
Finally (optionally), start the project using Maven:
mvn spring-boot:run
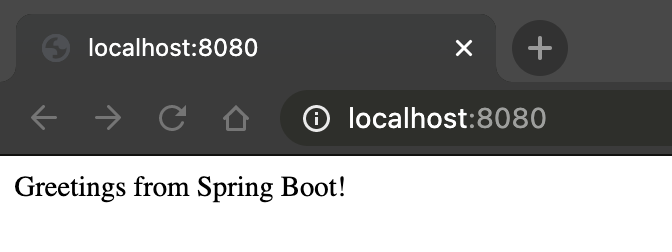
Navigate to localhost:8080 and you should see the following message:
2. Create a Dockerfile
A Dockerfile tells docker how to build an image. We are going to build a maven base image (builder) so that you can run your code inside of it. It will contain all the dependencies to run your code!
### BUILD a maven builder. This will contain all mvn dependencies and act as an abstraction for all mvn goals
FROM maven:3.5.4-jdk-8-alpine as builder

# create app folder for sources
RUN mkdir -p /build
RUN mkdir -p /build/logs

# The WORKDIR instruction sets the working directory for any RUN, CMD, ENTRYPOINT, COPY and ADD instructions that follow it in the Dockerfile.
WORKDIR /build
COPY pom.xml /build
#Download all required dependencies into one layer
RUN mvn dependency:resolve
3. Create docker-compose.yml
Docker Compose is a wrapper around Docker. It lets you encapsulate commands which would be very long and hard to remember. Here we are going to create a docker-compose file which will use our Dockerfile to build a base image. Subsequently, we will then use this base image to mount our source code into a container and start up the spring-boot server!
x-config:
  - &MVN_BUILDER "maven/builder:0.0.1"
  - &CONTAINER_NAME "spring-container"
  - &BUILDER_CONTAINER_NAME "maven-builder"
version: "3.7"
services:
  dev:
    image: *MVN_BUILDER
    container_name: *CONTAINER_NAME
    ports:
      - "8080:8080"
    volumes:
      - "./src:/build/src"
      - "./logs:/build/logs"
    command: "mvn spring-boot:run"
  maven:
    build:
      context: .
      dockerfile: Dockerfile
    image: *MVN_BUILDER
    container_name: *CONTAINER_NAME
I will cover a few of the terms used in the compose file:
devandmavenare two Dockerservices.devis used to run your app during development.mavenis used for building a base image that contains all of your dependencies. Typicallyservicesare reserved for a component of an application. e.g. The front-end or the back-end. I typically like to decouple different components.imageis simply the name of your image.container_nameis simply the name of the container. Docker will generate a unique name if this is omitted.portsis where we are mapping a port from inside the container to outside the container. Here we are mapping port8080inside the container to port8080on our host.volumesis where we are mounting our code. In this example, you can see we are mounting oursrcwhich contains all of our code. We also mount alogsfolder so that we can persist logs outside of the container.commandis literally the command you want to run when the container starts. Note this will run in theWORKDIRwe defined in theDockerfile
Note: The x-config at the top of the file is used for constants. I like using this pattern because anything that needs to change is on the top of the file. This makes your Docker setup a little easier to maintain over time. If the base image version changes you only need to make an update in one place. I borrowed this pattern from my co-worker Steven. Thank you Steven!
4. Build a Base Image
Now that we know how to build the image, let's do it!
docker-compose build maven
This may take a few minutes, but you should get a success message at the end with the name of your image name.
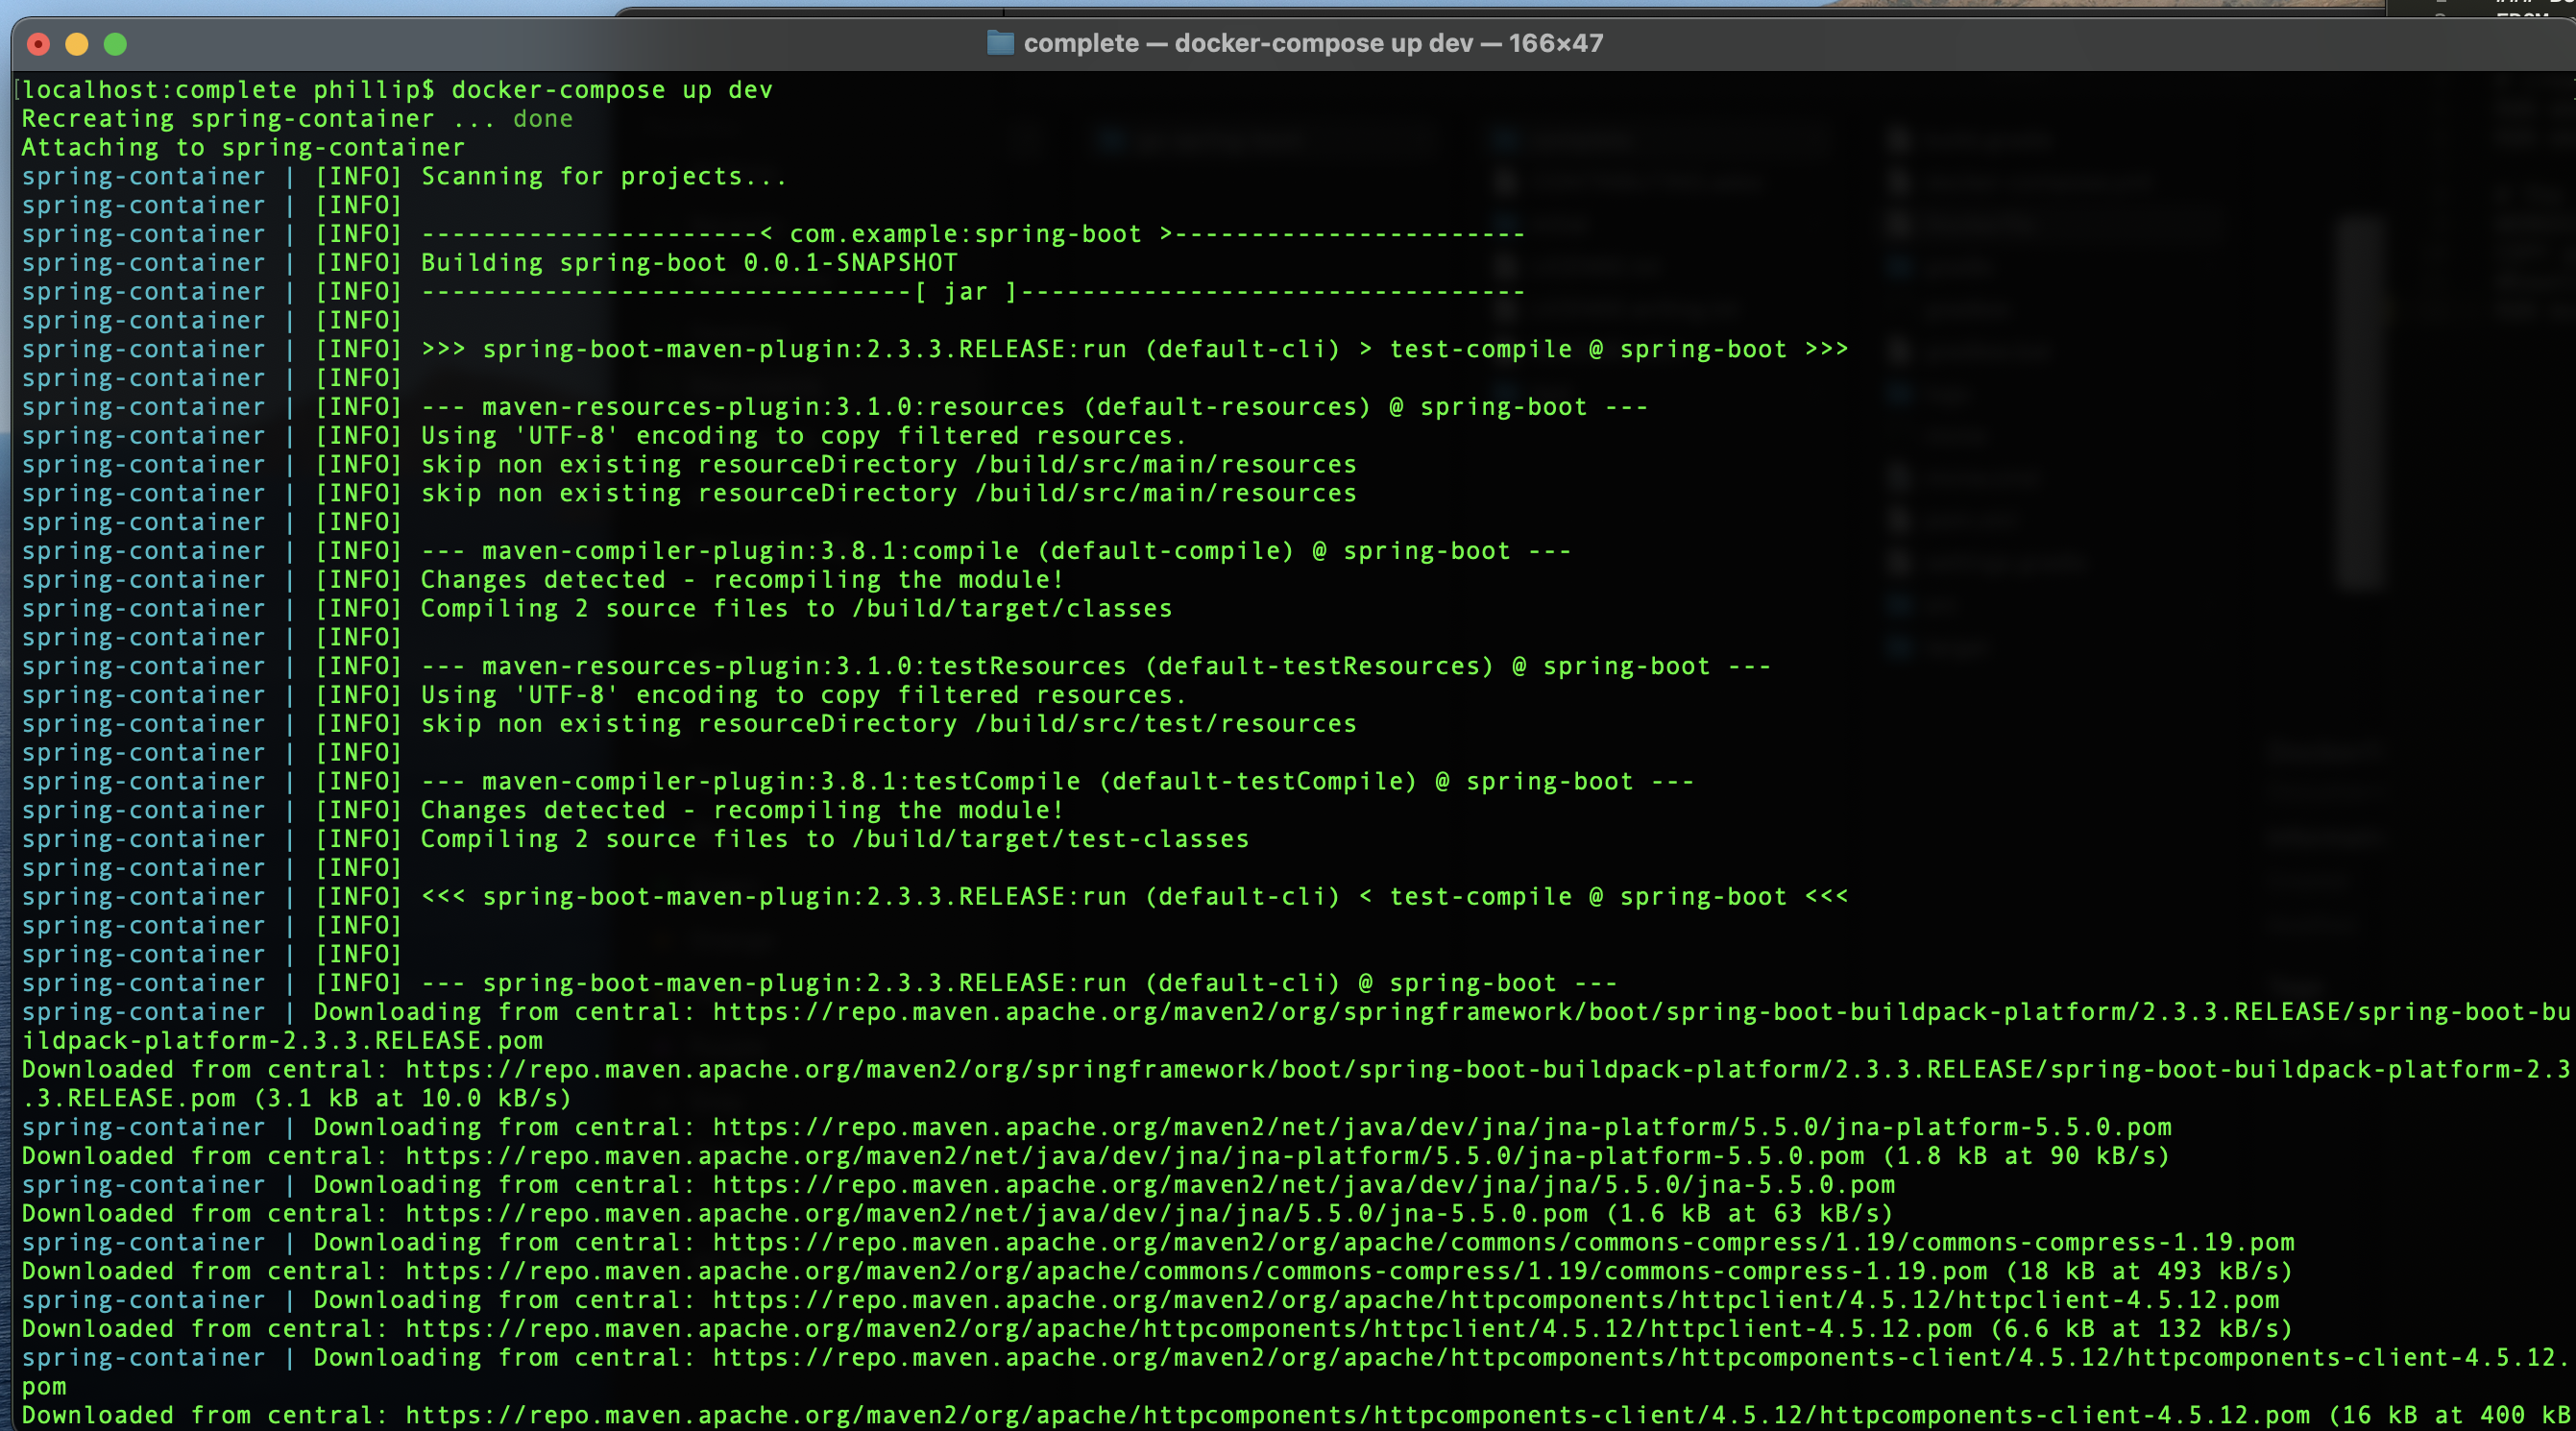
5. Start Spring Boot
Finally, the moment you have been waiting for!
5
4
3
2
1!
docker-compose up dev
Caveats
One thing to note is that the pom.xml has been copied into the image and we have "tried" to install all dependencies listed in the pom. Therefore, if you need to add any new dependencies you should bump the image version number (maven/builder:0.0.2) and rebuild the base image. Don't forget to push the updated image if you are collaborating with others!
Another well-documented issue is that Maven does not always download all the dependencies. The first time you run this new image you can see it goes to download some new dependencies. This can be problematic if you have proprietary maven dependencies or run your container without internet access. However, it is not a blocker, it just requires some proprietary code in your Dockerfile! Feel free to comment on any questions about this.
Conclusion
That's it! You can now develop code as you would any other Spring Boot app. You don't need to install Maven or a specific version of Java. There are a few things we can do to improve the build time and image size but I will leave that exercise for a future post. You can also push this image to your favorite Docker repo and use it anywhere you would like. Happy Container, Happy Developer!
Code
Here is a link to my git repo for this post: Spring Boot Docker Intro
Pro Tip
Use the following bash alias to start your app with two characters.
alias up='docker-compose up dev'


